There’s something truly magical about creating your own pastry dough from scratch. I remember the first time I tried making phyllo dough at home. It was a rainy Sunday afternoon, and I was determined to master the art of paper-thin layers. The process felt like a labour of love, but the result was worth every moment.
Traditional phyllo is often made with wheat flour, but this guide focuses on a gluten-free version that’s just as versatile. Whether you’re crafting a savoury spanakopita or a sweet baklava, this recipe has been tested repeatedly to ensure it’s foolproof for busy home cooks.
In this article, you’ll find detailed ingredient lists, step-by-step instructions, and practical tips to make the process enjoyable. Let’s dive in and discover the joy of creating homemade pastry dough that’s both accessible and delicious!
Table of Contents
Introduction to Gluten Free Filo
Crafting your own pastry dough at home brings a sense of accomplishment and creativity. When it comes to phyllo, the thin, delicate layers are what make it truly special. Unlike traditional versions, a gluten-free alternative opens up a world of possibilities for those with dietary restrictions or preferences.
What Makes It Special
Gluten-free filo stands out because it uses a unique flour blend to achieve the same flaky, light texture as its wheat-based counterpart. This adaptation allows you to enjoy classic dishes like spanakopita or baklava without compromising on taste or texture. The key lies in the careful balance of ingredients and technique.
Benefits of Homemade Phyllo Dough
Making your own dough at home offers several advantages. You can customise the flour blend to suit your taste or dietary needs. Using a smooth, clean surface and rolling with precision ensures those perfect, paper-thin sheets. Plus, the satisfaction of creating something entirely homemade is unmatched.
Here’s a quick comparison of traditional and gluten-free phyllo:
| Aspect | Traditional Phyllo | Gluten-Free Phyllo |
|---|---|---|
| Flour Type | Wheat Flour | Custom Flour Blend |
| Texture | Flaky and Light | Equally Flaky and Light |
| Dietary Suitability | Contains Gluten | Gluten-Free |
Imagine the joy of serving a dish made entirely from scratch, knowing every ingredient and step was tailored by you. Whether you’re new to baking or a seasoned pro, this recipe invites you to explore the art of homemade pastry with confidence.
Essential Ingredients and Flour Blends
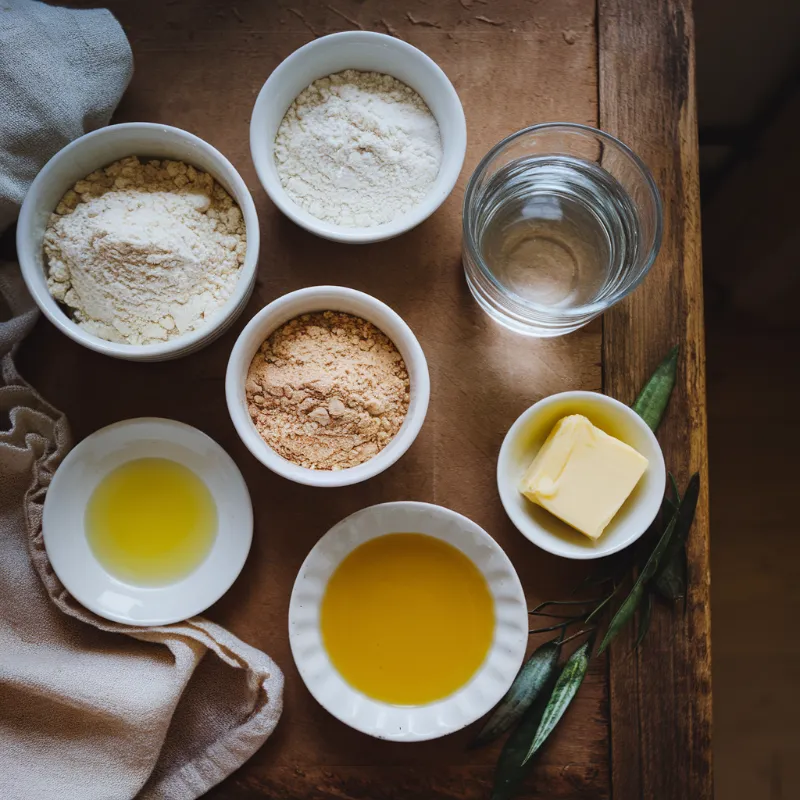
The secret to perfect pastry lies in the quality and balance of your ingredients. Each component plays a crucial role in achieving that delicate, flaky texture we all love. Let’s explore the essentials you’ll need to create a flawless dough.
Gluten Free Flour Options
Choosing the right flour blend is critical for success. Here are some popular options:
- Sweet Rice Flour: Adds elasticity and a smooth texture.
- Almond Flour: Brings a rich, nutty flavour but should be used in moderation.
- Coconut Flour: Highly absorbent, so adjust liquid ingredients accordingly.
Experiment with combinations to find the perfect blend for your recipe. A mix of two to four flours often yields the best results.
The Role of Xanthan Gum and Butter
Xanthan gum is a game-changer in pastry dough. It replaces the elasticity that gluten provides, ensuring your dough holds together beautifully. Use it sparingly—just a teaspoon can make a big difference.
Butter, whether melted or in its solid form, is equally important. It adds richness and helps create those flaky layers. Melted butter is ideal for mixing into the dough, while cold butter is perfect for folding techniques.
| Ingredient | Role | Tips |
|---|---|---|
| Xanthan Gum | Provides elasticity | Use 1 tsp per cup of flour |
| Melted Butter | Enhances flavour and texture | Add gradually for even distribution |
| Flour Blend | Forms the base of the dough | Combine 2-4 flours for best results |
With these ingredients and tips, you’re well on your way to mastering the art of pastry dough. Happy baking!
Equipment and Preparation
You don’t need fancy gadgets to create stunning pastry dough—just a few basic kitchen essentials. With the right tools and a well-organised workspace, you’ll find the process smooth and enjoyable. Let’s dive into what you’ll need and how to set up your kitchen for success.
Tools You Will Need
Here’s a list of common kitchen items that will make your pastry-making experience a breeze:
- Rolling pin: A thin, long pin is ideal for achieving those paper-thin layers.
- Mixing bowl: A sturdy bowl ensures your ingredients blend seamlessly.
- Parchment paper: Prevents sticking and makes cleanup easier.
These tools are likely already in your kitchen, so there’s no need for special purchases. Keep them handy, and you’re good to go!
Setting Up Your Workspace
Preparation is key to a stress-free baking session. Start by clearing your countertop to create a clean, spacious surface. Lightly flour the area to prevent the dough from sticking as you roll it out.
Place your bowl, rolling pin, and parchment paper within easy reach. A tidy workspace not only speeds up the process but also makes it more enjoyable. Remember, a little organisation goes a long way!
With these simple steps, you’re ready to tackle pastry dough like a pro. Happy baking!
Step-by-Step Gluten Free Filo Dough Preparation

Creating your own pastry dough from scratch is a rewarding experience that anyone can master. With a few simple steps, you’ll achieve those delicate, paper-thin layers that make this dough so special. Let’s walk through the process together!
Mixing and Kneading the Dough
Start by combining your dry ingredients in a large mixing bowl. Use a whisk to ensure they’re evenly distributed. Gradually add lukewarm water and oil, mixing until a cohesive dough forms. Knead the mixture gently but firmly for about 5 minutes until it becomes smooth and elastic.
If the dough feels sticky, sprinkle a little extra flour blend and continue kneading. This step is crucial for achieving the right texture, so take your time!
Allowing the Dough to Rest
Once kneaded, shape the dough into a ball and cover it with a damp towel or cling film. Let it rest at room temperature for at least 30 minutes. This resting period allows the dough to relax, making it easier to roll out later.
Patience is key here—don’t rush this step. A well-rested dough will reward you with perfect, tear-free sheets.
Rolling Techniques for Paper-Thin Sheets
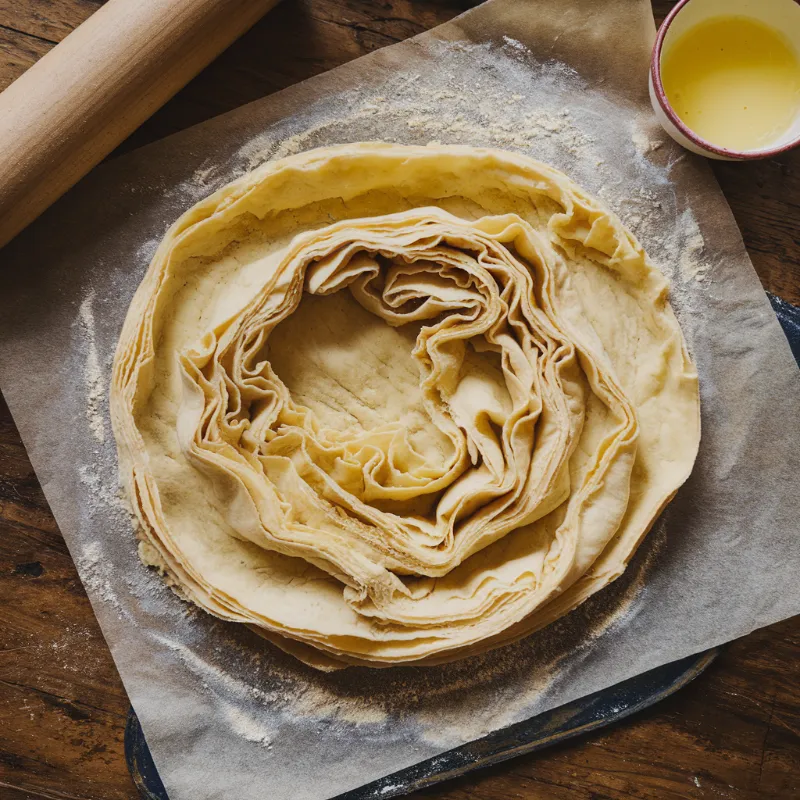
After resting, divide the dough into smaller portions. Lightly flour your work surface and rolling pin to prevent sticking. Start rolling from the centre, applying gentle pressure to create even, thin sheets.
If the dough starts to tear, don’t worry! Simply patch it up and continue rolling. Aim for a thickness of about 1/8 inch for the best results.
- Roll in one direction to maintain even thickness.
- Use a light touch to avoid overworking the dough.
- Keep your work surface floured to prevent sticking.
With these techniques, you’ll master the art of rolling out perfect sheets in no time. Happy baking!
Mastering Gluten Free Filo for Spanakopita
Mastering the art of spanakopita is a delightful journey that combines tradition with creativity. This classic dish, with its flaky layers and rich filling, is a favourite for many. Let’s dive into how you can perfect it at home!
Preparing the Spanakopita Filling
The heart of a great spanakopita lies in its filling. Start with fresh spinach, sautéed until wilted, and combine it with tangy feta cheese. Add finely chopped shallots and a mix of fresh herbs like dill and parsley for extra flavour. This combination creates a filling that’s both vibrant and delicious.
Pro tip: Prepare the filling a day ahead to save time. Just store it in the fridge until you’re ready to assemble your dish.
Folding and Layering the Filo
Layering the dough is where the magic happens. Start by brushing each layer with melted butter to ensure crispiness. Use a pizza cutter to trim the dough into neat rectangles, making it easier to handle.
Here’s how to fold it:
- Place a spoonful of filling on the bottom edge of the dough.
- Fold the dough over the filling, creating a triangle.
- Continue folding in a zigzag pattern until you reach the end.
Be gentle to avoid tearing the delicate dough. If it does tear, simply patch it up and keep going. The final result will still be stunning!
Encourage your creativity by experimenting with different fillings or folding techniques. The process is as enjoyable as the dish itself!

Gluten-Free Filo Dough
Ingredients
Equipment
Method
- Combine Dry Ingredients: In a large bowl, whisk together the sweet rice flour, tapioca starch, almond flour, xanthan gum, and salt.
- Add Wet Ingredients: Gradually add olive oil and warm water, mixing continuously until a soft dough forms.
- Knead Dough: Knead gently for 5 minutes until smooth. If the dough feels too sticky, sprinkle in extra sweet rice flour.
- Rest Dough: Cover with a damp towel and let rest at room temperature for 30 minutes.
- Roll Thin Sheets: Divide dough into small portions. Lightly flour a surface and roll each portion into a thin sheet (as thin as possible).
- Layer and Use: Brush each sheet lightly with melted butter before layering for best results. Use immediately or refrigerate for later use.
Enhancing the Taste with Glazed Butter
The golden secret to perfect pastry lies in a simple yet transformative ingredient: melted butter. Brushing each layer with this glossy glaze not only adds richness but also creates that signature flaky texture and golden top we all love.
Start by melting your butter gently until it’s smooth and liquid. Using a tablespoon measure, lightly brush each sheet of dough before layering. This ensures even distribution and prevents sogginess. A little extra brushed on can make a big difference in both taste and texture.
Here’s a note to keep in mind: consistency is key. Too much butter can weigh down the dough, while too little may leave it dry. Aim for a thin, even coat for the best results.
Don’t be afraid to experiment! Try using different types of butter, like salted or unsalted, or even infused melts with herbs or garlic for added zest. The possibilities are endless, and your pastry will thank you for it!
Frequently Asked Questions :
Is there a gluten-free filo?
Traditional filo pastry is made with wheat flour, so it contains gluten. However, some brands have developed gluten-free alternatives using rice flour, tapioca starch, or cornflour. These options can be harder to find, but some specialty stores and online retailers stock them. You can also make your own gluten-free filo using a mix of gluten-free flours and xanthan gum to create thin, flexible layers.
Do Sainsbury’s sell gluten-free puff pastry?
Yes! Sainsbury’s offers gluten-free puff pastry, such as Jus-Rol Gluten Free Puff Pastry Sheet. You can find it in the free-from section or the refrigerated pastry aisle. Availability may vary, so checking online or calling your local store is a good idea.
Is Jus-Rol puff pastry gluten-free?
Jus-Rol has a specific gluten-free puff pastry sheet, clearly labeled as gluten-free. However, their standard puff pastry contains wheat, so be sure to choose the right one. The gluten-free version is made with ingredients like maize starch and rice flour to achieve a flaky texture.
Can Coeliacs eat filo pastry?
No, regular filo pastry is not safe for people with coeliac disease because it contains gluten. If you have coeliac disease, you’ll need to look for a certified gluten-free version or make your own at home with gluten-free flour alternatives.
Is Lea & Perrins gluten-free?
No, Lea & Perrins Worcestershire sauce contains malt vinegar made from barley, which means it is not gluten-free. Some alternative Worcestershire sauces are made without gluten, so always check the label.
Can Coeliacs eat gluten-free pasta?
Yes! Gluten-free pasta made from rice, corn, quinoa, or legumes is safe for coeliacs. Just ensure it’s certified gluten-free to avoid cross-contamination.
